Organize a Pantry with Visible Use-First Food and Clear Categories
An organized pantry helps you find what you already have before buying more. Group foods in a way that matches your cooking, keep packages identifiable and give items you intend to use soon a visible place.
An organized pantry helps you find what you already have before buying more. Group foods in a way that matches your cooking, keep packages identifiable and give items you intend to use soon a visible place.
Choose categories from your meals
| Cooking pattern | Pantry group to try | Keep visible |
|---|---|---|
| Frequent breakfasts | Breakfast ingredients together | Open packages and remaining quantities |
| Regular baking | Baking supplies with their original information | Ingredient identity and appropriate storage instructions |
| Quick evening meals | Common meal components near each other | What is available without checking several shelves |
| Many unopened duplicates | Backups behind the active package | Quantity and relevant date information |
Step 1: Empty One Section at a Time
If your pantry is large, do not empty every shelf at once. Work shelf by shelf or category by category so the project stays manageable.
Step 2: Remove Expired and Unused Food
Check dates, opened packages, duplicates, and foods your household no longer uses. Follow appropriate food-safety guidance when deciding what to keep or discard.
Step 3: Group Similar Foods Together
Create broad categories that make sense for your household. Examples include:
- Breakfast foods
- Snacks
- Baking supplies
- Pasta and grains
- Canned goods
- Sauces and condiments
- Drinks
Broad categories are usually easier to maintain than highly specific ones.
Step 4: Put Everyday Foods at Eye Level
Items you reach for most often should be easy to see and reach. Store less-used items higher or lower.
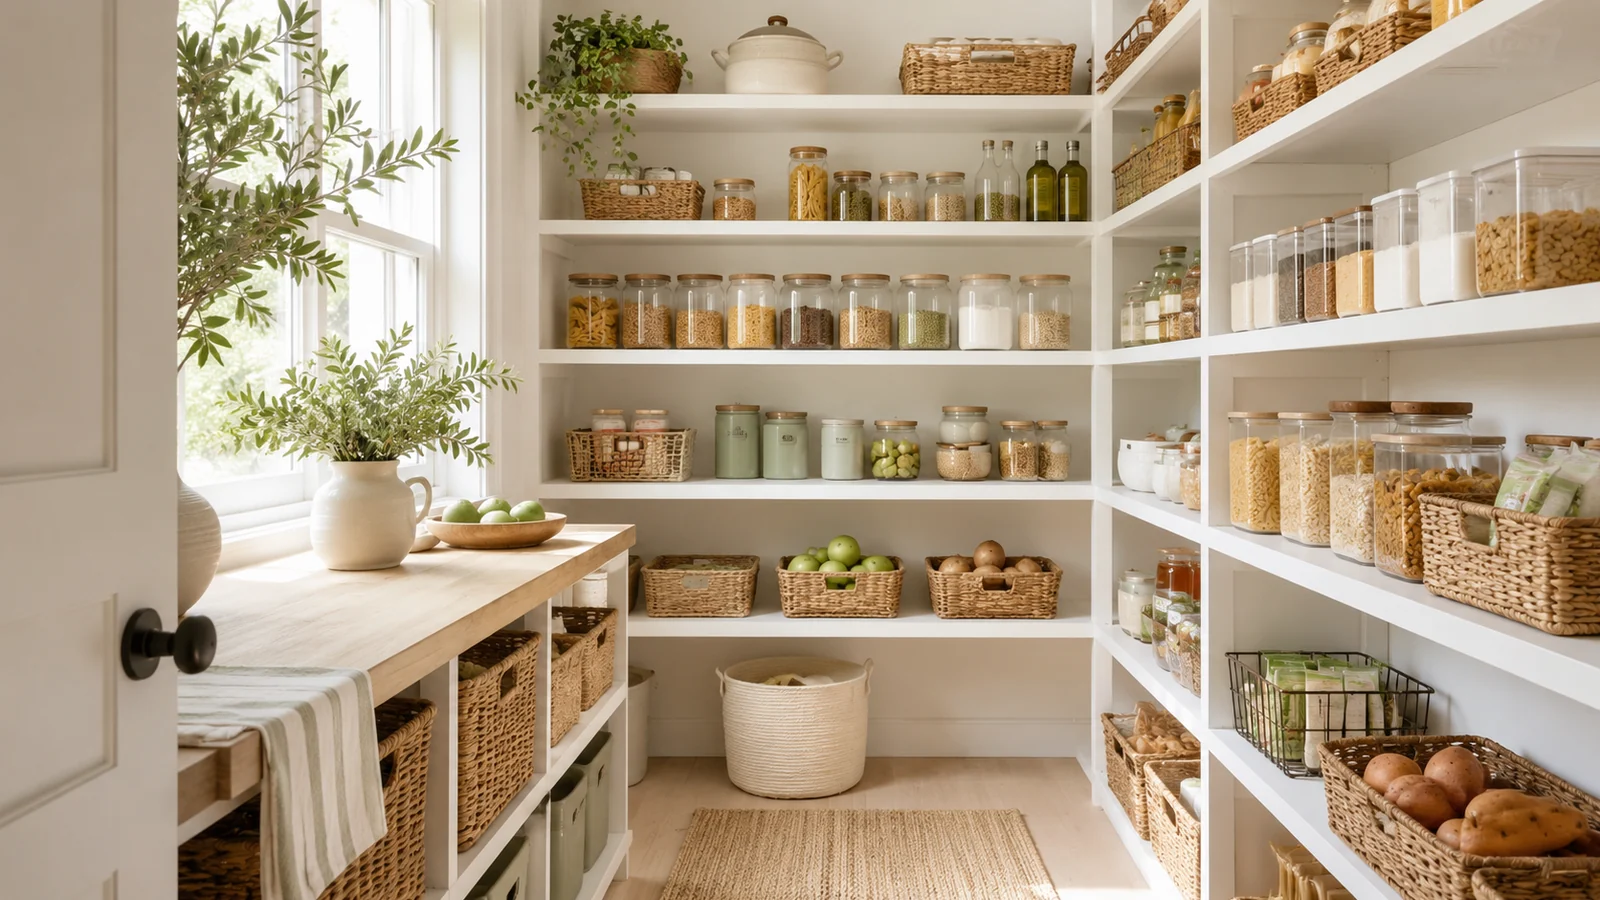
Step 5: Use Baskets for Loose Categories
Baskets or bins are useful for packets, snacks, baking decorations, and other small items that otherwise spread across shelves.
Do not buy containers until you know what category they will hold.
Step 6: Use Clear Containers Selectively
Clear containers can help with foods such as flour, rice, oats, or cereal, but transferring every package is not necessary. Use them where they genuinely improve visibility or storage.
Step 7: Create a “Use Soon” Area
Keep a small basket or section for foods that should be used soon. This is especially useful for half-open packages, near-date foods, and ingredients purchased for one specific recipe.
Step 8: Avoid Overfilling Shelves
A pantry that is packed completely full is difficult to maintain. Leave some breathing room so groceries can be returned quickly.
Step 9: Make Grocery Put-Away Easy
If snacks always go in one basket and pasta always goes on one shelf, putting groceries away takes less thought. Good organization reduces friction.
Step 10: Label Only Where It Helps
Labels can make a shared pantry easier to maintain, but they are not required everywhere. Use them for bins or categories that household members frequently mix up.
Pantry Zones That Work Well
A simple arrangement might look like this:
- Top shelf: backup and rarely used items
- Eye-level shelves: everyday foods
- Lower shelves: heavier items
- Floor: bulk packages or baskets
How to Organize a Small Pantry
In a small pantry, protect your most accessible shelf space. Avoid storing rarely used appliances or non-food clutter where everyday ingredients need to go.
How to Organize Deep Pantry Shelves
Use bins or turntables to prevent items from disappearing in the back. Grouping helps you pull out one category instead of moving several unrelated items.
A Five-Minute Weekly Pantry Reset
- Return misplaced items.
- Move foods that should be used soon to the front.
- Wipe one obvious spill.
- Check for empty packages.
- Make a note of anything running low.
Preserve useful package information
If you move food to another container, retain its identity, allergen information, instructions and relevant dates. Label the new container and keep what you need from the original packaging. A matching jar is less useful if it leaves you guessing what it contains.
Create a small use-first area only for food that is still safe and appropriately stored. A printed date’s meaning varies by product and wording; uncertain safety needs the applicable food guidance. Review the active packages before shopping so the system reduces forgotten duplicates.
Browse more practical Tidy Home Lab guides for this part of your home.
Explore Organizing →Related Guides